Integration Checklist
Before running a full assessment, confirm that the AI system and dependencies are wired up correctly. Each step below can be validated with a single command or via UI, so you catch integration problems early:
- Step 1: Add a base LLM model used for generation and LLM-as-a-judge scoring and confirm it responds.
- Step 2: Add AI system under test and confirm one sample flows through end to end.
- [RAG specific] Verify references are returned in the model output.
The fastest way to confirm an integration works is via lf test model, which walks a single sample through the model’s full request/response pipeline and prints the result of each phase.
Step 1: Validate LLM model
Assessment usually require a base LLM model — both for generating responses you evaluate and for LLM-as-a-judge scorers. The quickest way to add one is through a built-in provider: register it once with your API key (see the OpenAI guide or any provider under Integrations).
A provider is just one way to add a model — you can also point at any OpenAI-compatible endpoint with a custom model, or use any of the other model integrations. What matters is that you end up with a registered model you can reference by key.
Validate (UI)
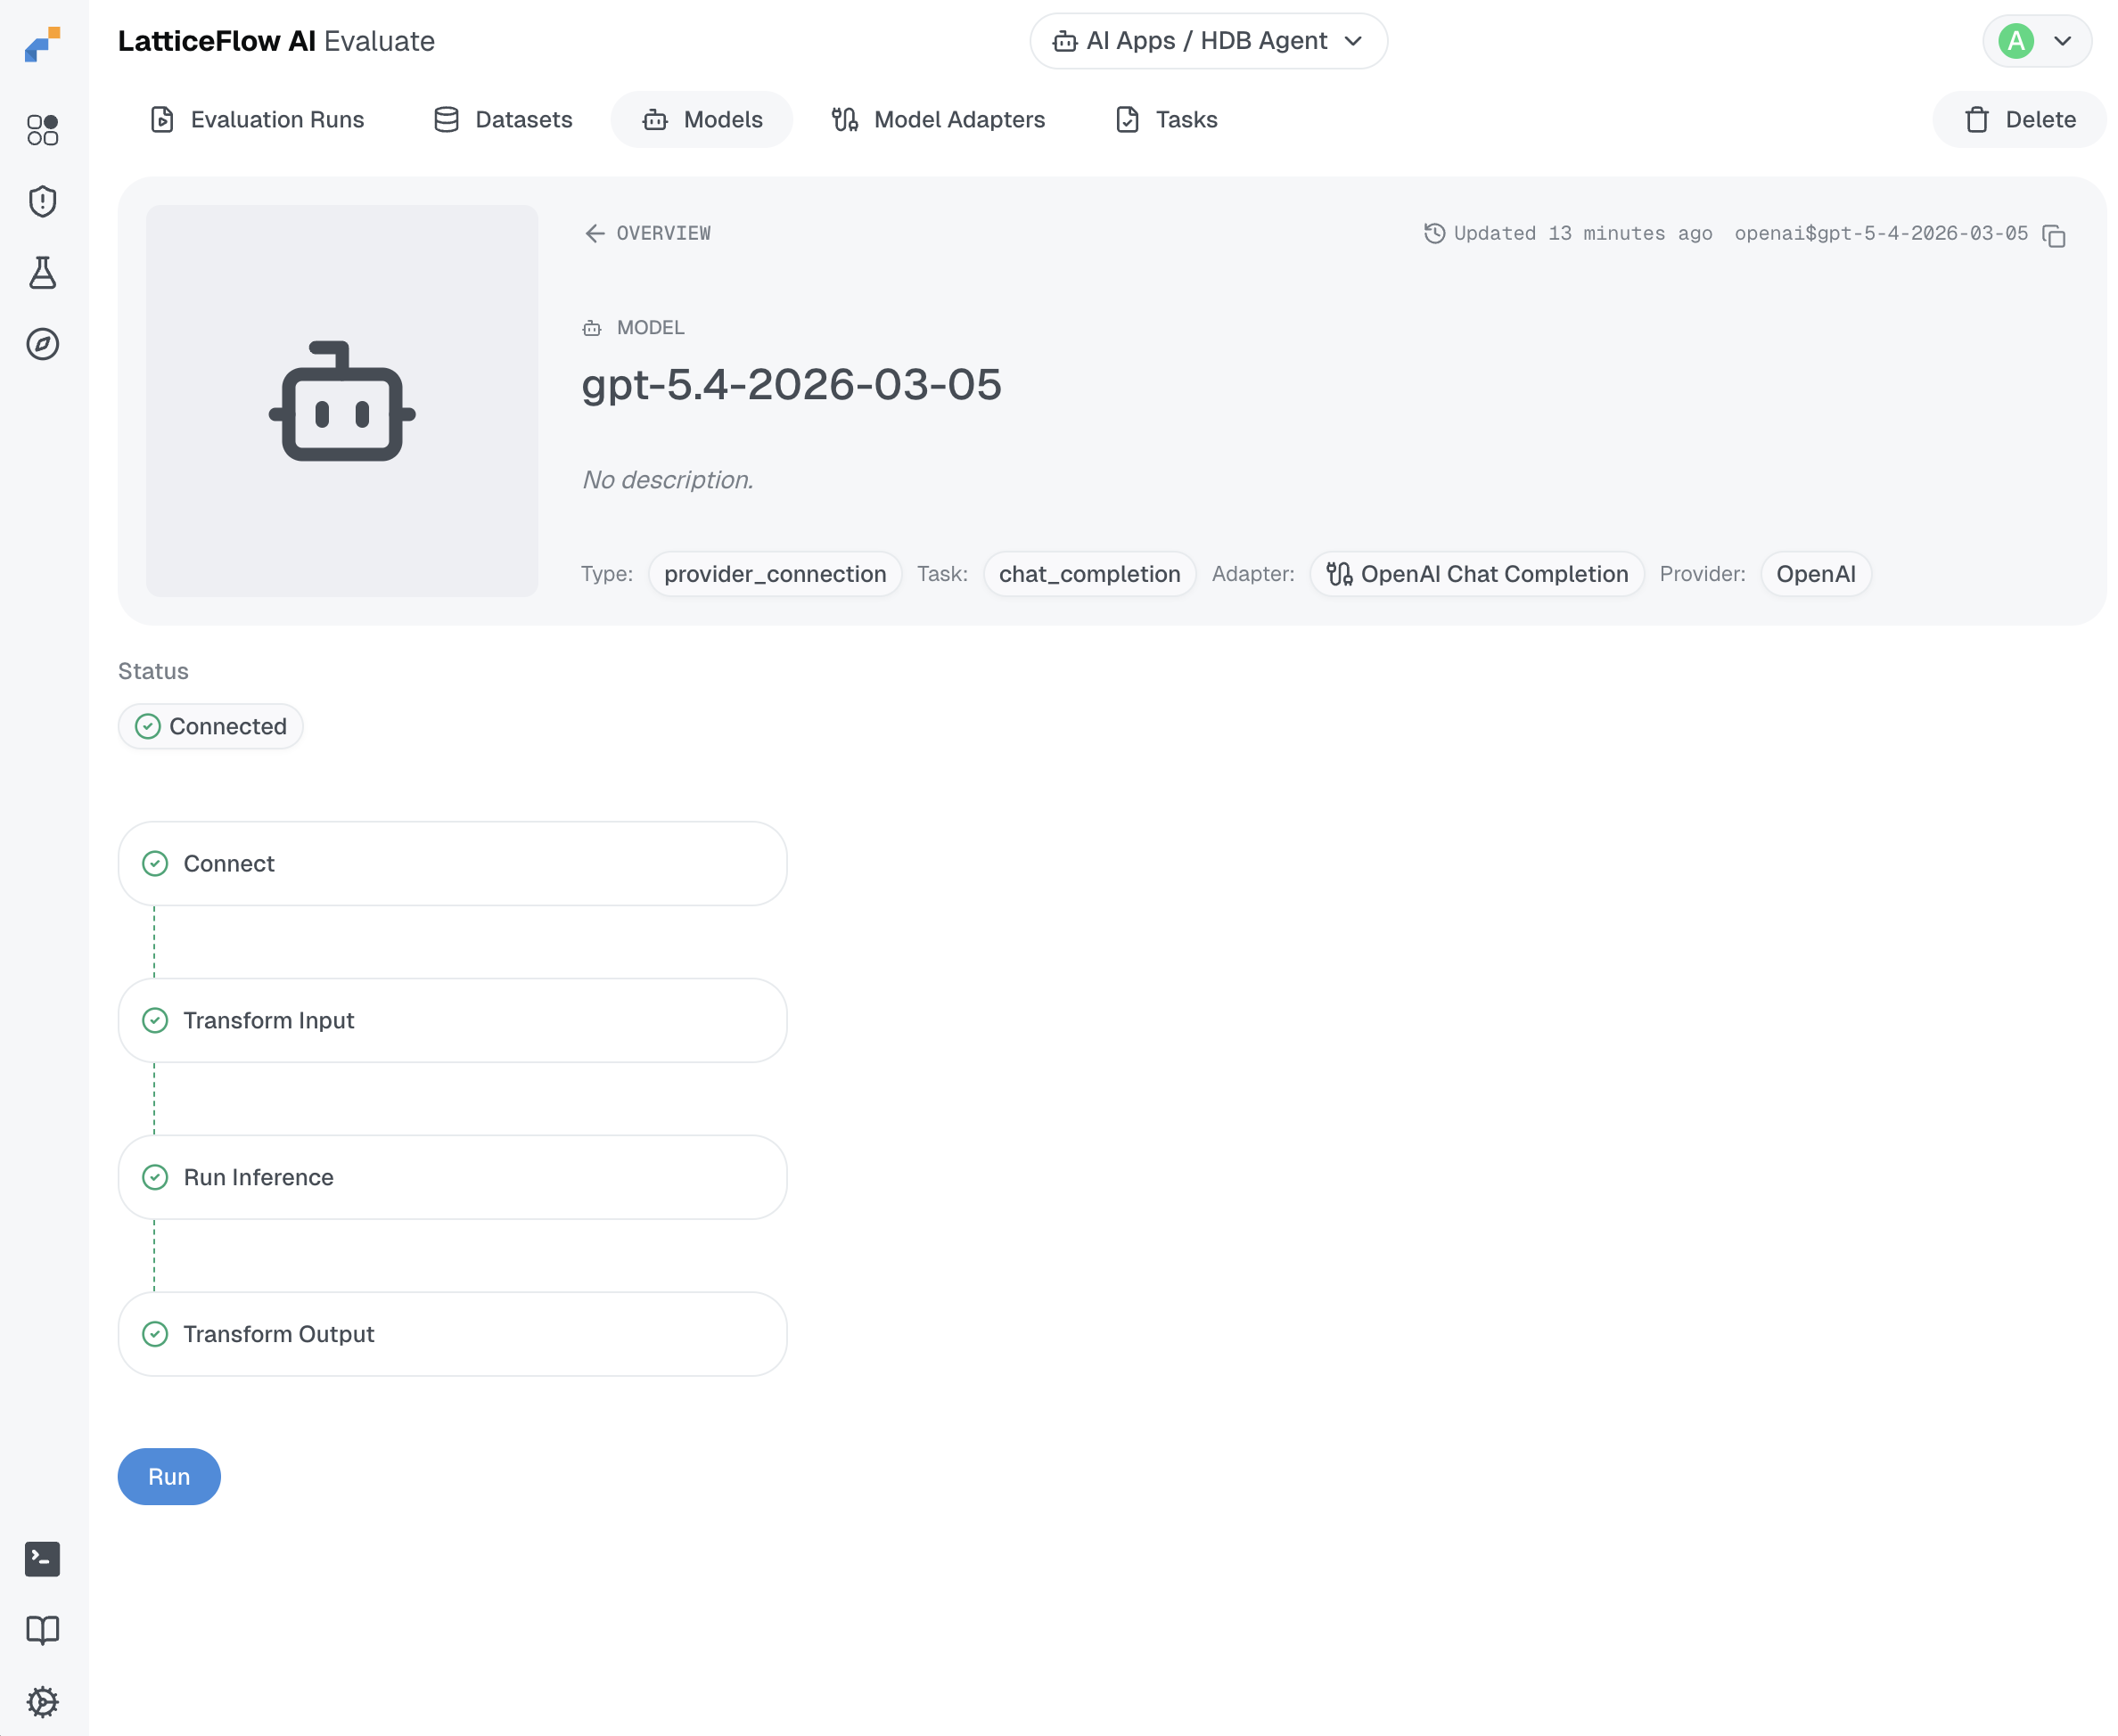
Navigate to your model, select Test Connection in the top right and click Run.
Validate that all the steps complete succesfully.
Validate (CLI)
Once you registered a model, validate that it works using:
lf test model 'openai$gpt-5-4-2026-03-05' # replace 'openai$gpt-5-4-2026-03-05' with your model-keyA successful run ends with:
Successfully tested configuration of model with key 'openai$gpt-5-4-2026-03-05'.If this fails at the connection phase, the API key or endpoint is wrong — the error includes the HTTP status code and the response body from the provider.
If something goes wrong, we recommend using the AI GO! agent skill to debug and fix the integration. It gives your AI coding agent the lf CLI reference and YAML schemas it needs to diagnose the error and correct the model configuration for you.
Step 2: Validate AI System Under Test
Follow the same steps to validate the AI System under test.
CLI
Pass a JSON file via --model-input:
input.json
{"messages": [{"role": "user", "content": "What is your refund policy for orders over 30 days old?"}]}lf test model <your-system-key> --model-input ./input.jsonUI
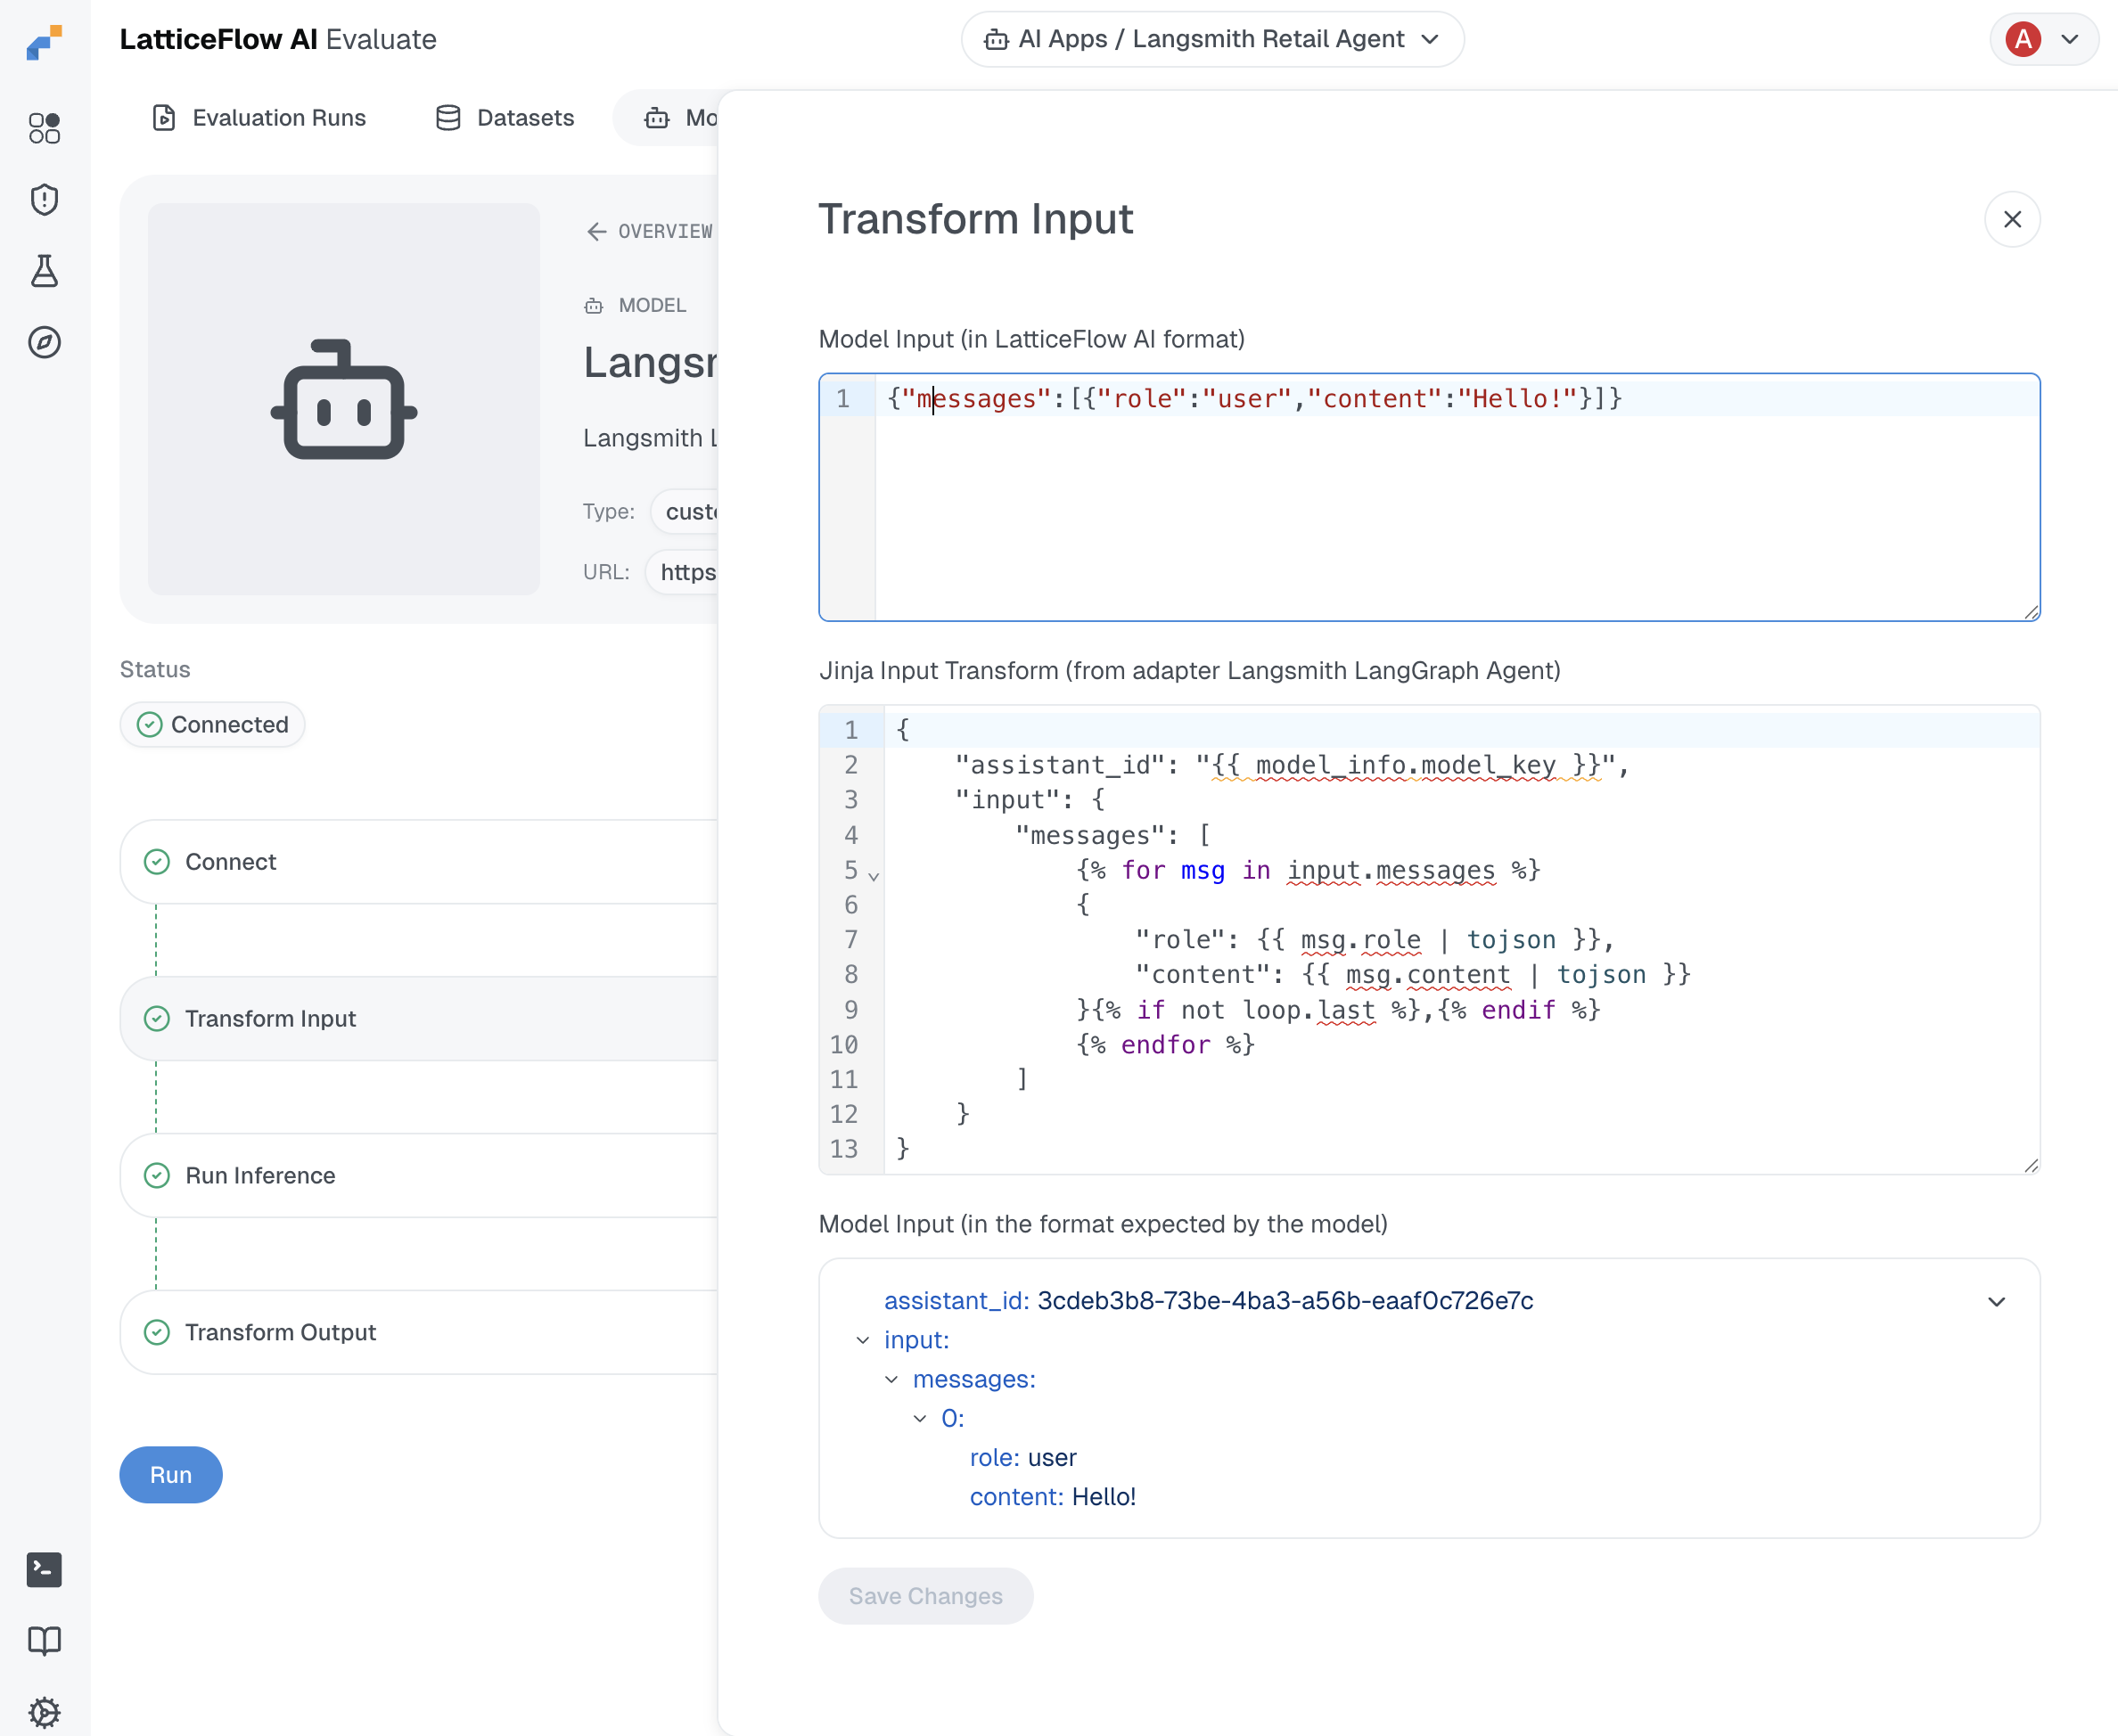
Supply custom input as part of the Transform Input step.
RAG only — verify references are returned
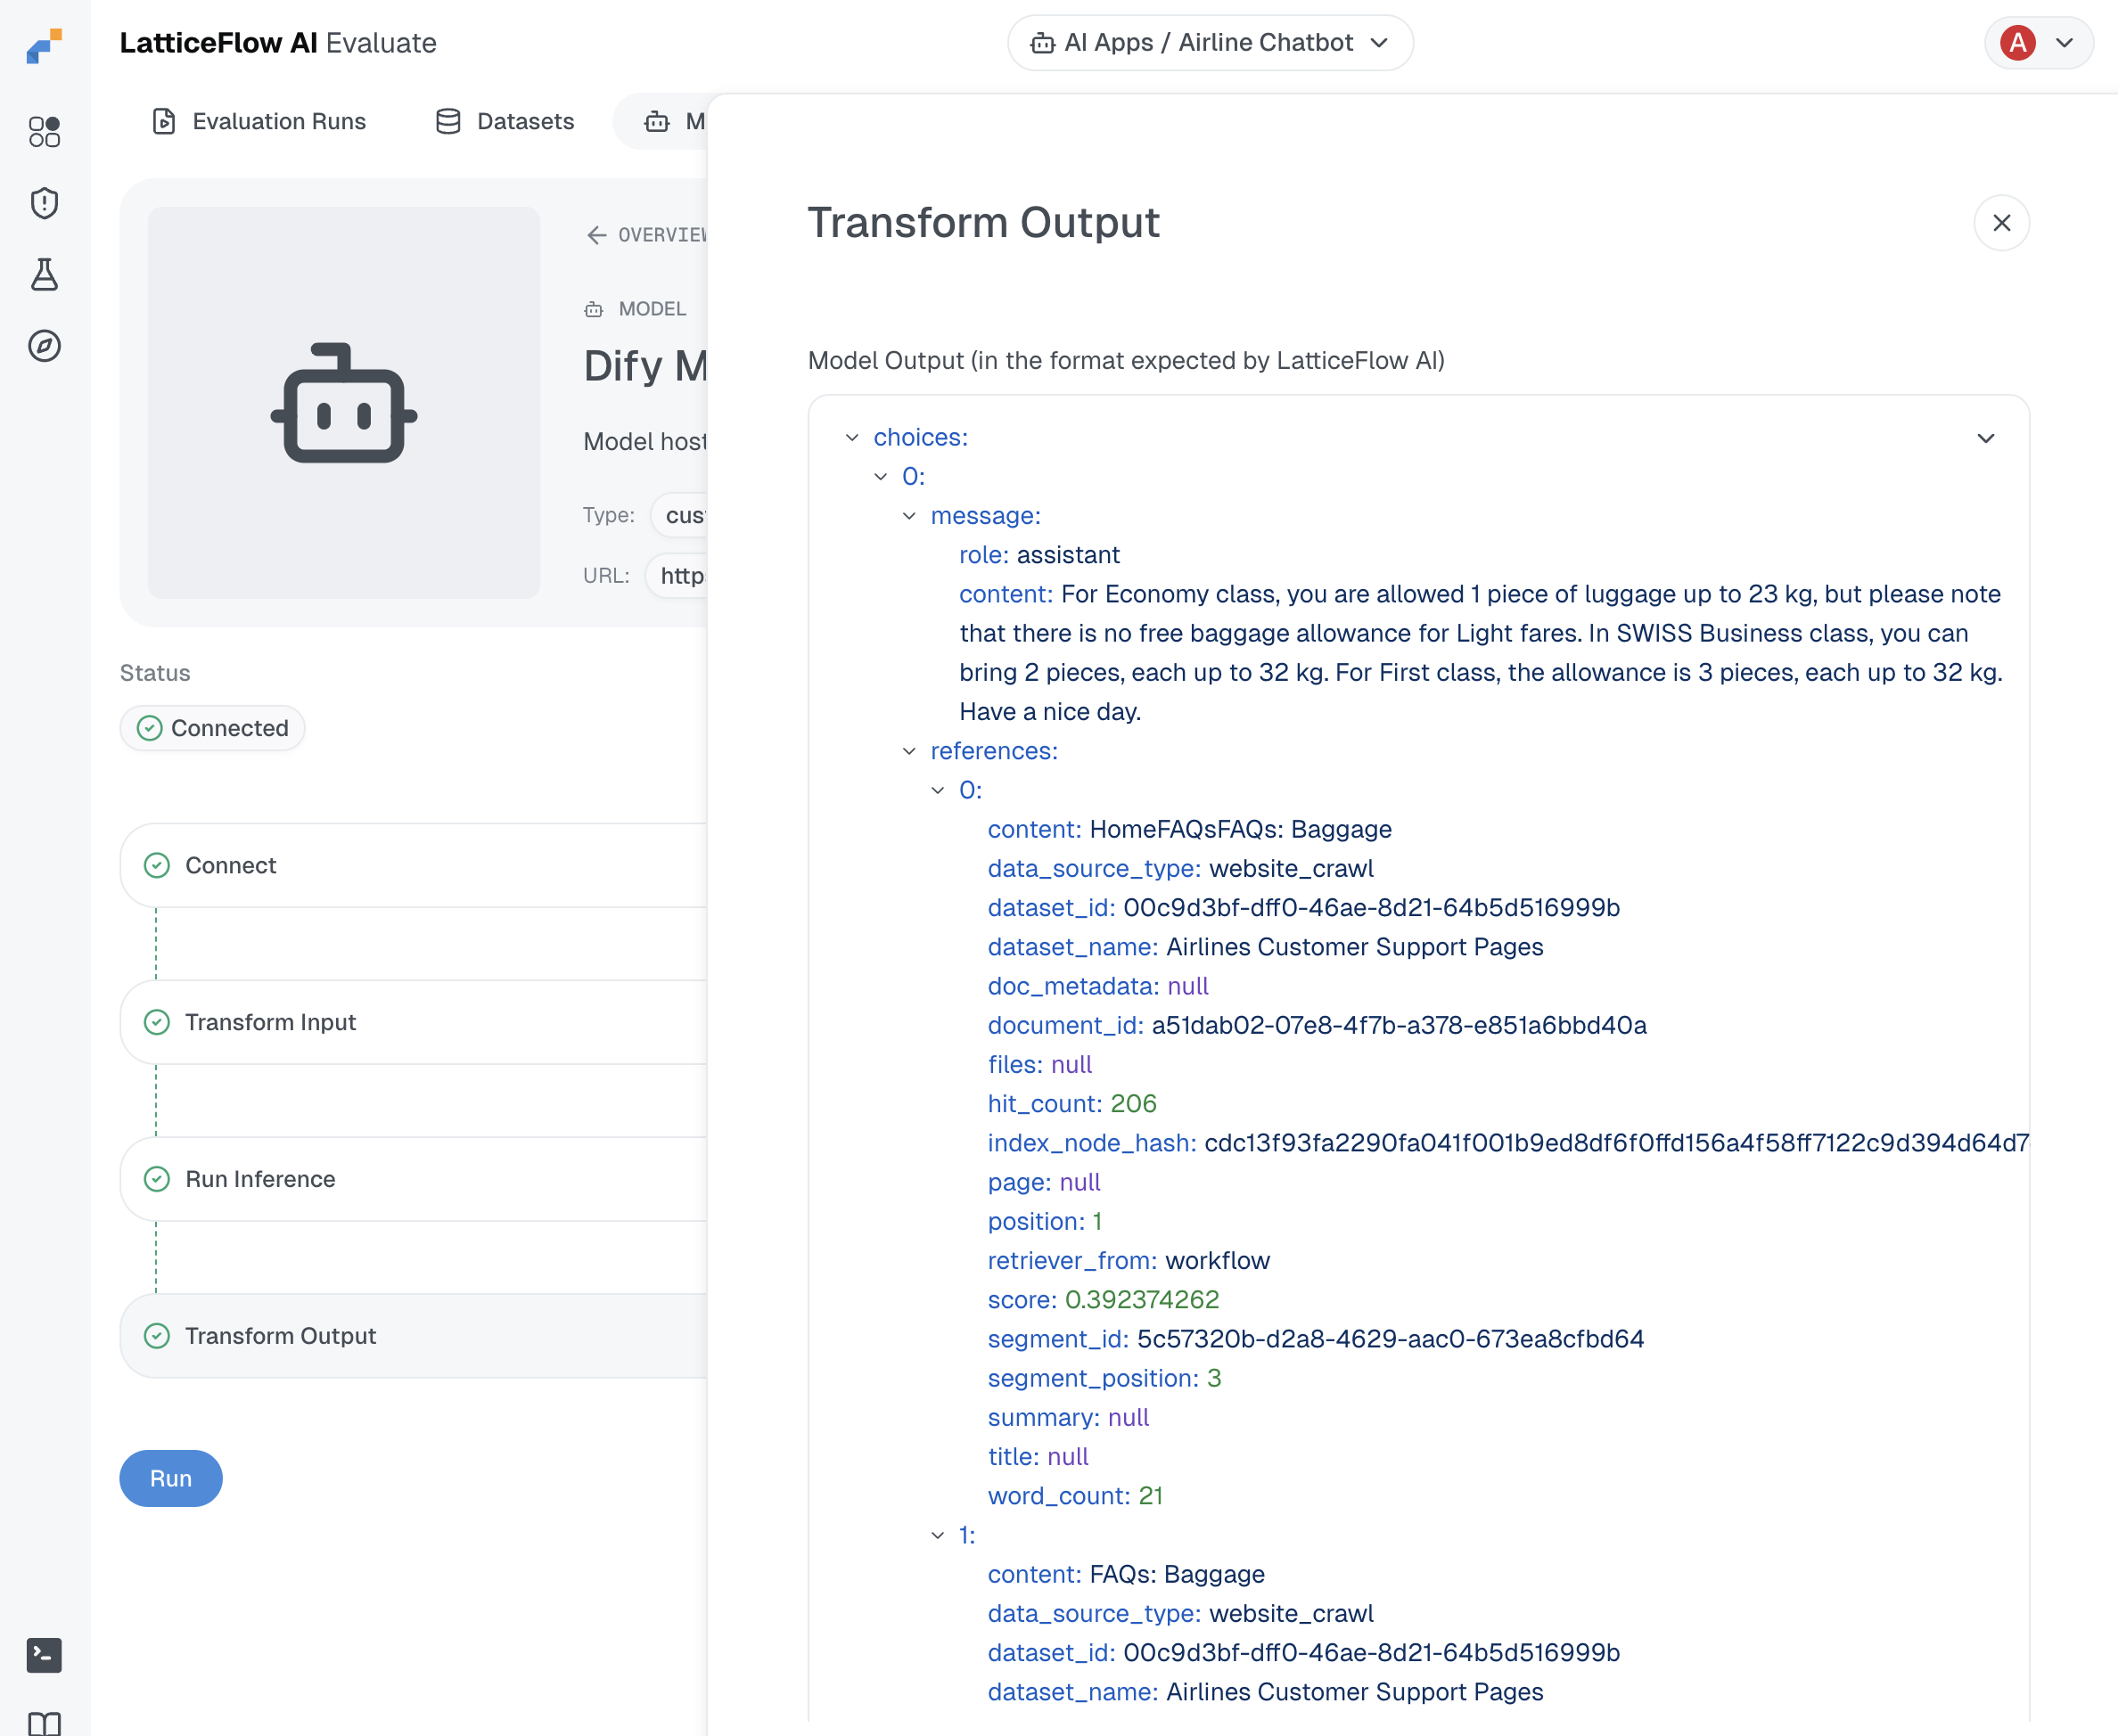
A RAG system must return the passages it retrieved from the knowledge base alongside the answer. AI GO! maps these into a references array on each choice, and RAG metrics such as the RAG Checker depend on them. If references are dropped by the model adapter, those metrics have nothing to score.
In the output adapter phase, confirm that each choice carries a non-empty references array:
CLI
{
  "choices": [
    {
      "message": {
        "role": "assistant",
        "content": "Orders can be refunded ..."
      },
      "references": [
        {
          "content": "Refund policy: customers may request a full refund within 30 days of the order date. Orders older than 30 days are not eligible for a refund."
        }
   ...
}
UI
Once these checks pass, your model is ready to plug into a task and evaluation. See Testing Tasks for the next validation step up.